When and How to Set Up Your Ambush Hunting Blind
Wondering when and how to set up your Ambush hunting blind? You’ve come to the right place! As early fall seasons rapidly approach, we should all be in the thick of gathering intel about our areas. Cameras should already be running if you plan on getting some action before the rut in November.
With potential hunting blind locations taking shape, it’s time to start getting them set up. If you choose your locations wisely, you’ll be able to use your Ambush blind through early and late seasons. Hard-sided blinds really pay off when the temps start dropping.
When to Set Up Your Ambush Hunting Blind
Most expert whitetail hunters agree that a span of 3-6 weeks is needed for deer to get used to hunting blinds. This seems to hold true whether it is a ground blind, hard-sided blind, or any other structure that appears out of the norm in their “house.” This is especially true if blinds are right out in the open, which hard-sided blinds usually are.
Deer will notice. They are acutely aware of their areas. So, a change as abrupt as sticking a large box on stilts in their living room is bound to get some attention. However, the good thing is that deer habitat is always changing, so they will adapt. They just need enough time to do so without seeing anything strange near it – like other deer falling down dead.
Given that 3-6 weeks is a general rule of when to set up your hunting blind, this applies best to private land. Hopefully, you either have your own land or have access to land you can hunt.
It gets trickier with public land. You’ll have to dig into the local regulations of the areas you plan to hunt. State land is subject to the laws of each state, but many of them will allow you to set up at least 7-10 days in advance – sometimes more. For example, the Department of Fish and Wildlife in Washington doesn’t even have a restriction for hunting blinds set up on their land. Just as long as you have everything pulled by the end of hunting season, you’re good.
U.S. National Forest rules are set by the local ranger districts, so those can vary as well. On Michigan National Forests, you can’t erect deer blinds until September 1st. But you can leave them up until the 1st of the upcoming year.
You may be wondering about the best time of day to set up your Ambush hunting blind. The best time of day is when deer activity is the lowest, and that can vary from area to area. In general, the early afternoon should be a great time to get started. Set up alone will take about 4 hours if you’re using it with the stand. Just be aware of your surroundings and ensure you aren’t clanking away next to a bedding area.
The setup of your hard-sided blind is going to cause a disturbance; that part is certain. It’s an involved process that will, at the very least, include using an ATV and trailer to get the blind to your location. That’s why doing it as far in advance as possible is important.
Allowing enough time before the season starts is more critical than the time of day it is set up. But taking any measures that result in the least impact on the deer you’ll be hunting is always best practice.
How to Set Up Your Ambush Hunting Blind
Pop-up blinds are super portable and a great way to go, especially for the mobile hunter. But perched up in a premium hard-sided Ambush blind is next level!
You won’t be hauling these out to any deep backcountry deer hunting areas, but hard-sided blinds are superb for hunting agriculture areas, food plots on your property, and front country woods that you can at least get an ATV and trailer through.
Careful selection of a hunting spot and good planning will go a long way in helping reduce any pitfalls that could occur. This is the first step, and you want to get this part right.
Your Ambush hunting blind already comes assembled. So, unless you’re setting up your blind on an elevated stand, you only need to worry about transport. You have a few options to get your blind to the selected location:
1. Tractor with fork attachment
Your John Deer will get your blind where you need it. If you have a fork attachment, swap it out with the bucket. Grab a couple of ratchet straps or one long strap, and you should have what you need.
Simply get the forks under your blind and use ratchet straps to secure it to the fork assembly. You can now drive your Ambush blind wherever it needs to go.
This method is best used for short jaunts on your farm or property with easy access. An added bonus of using a tractor: you can use it to install the blind on the 5- or 10-foot blind stand if you plan on elevating it.
2. ATV or truck and utility trailer
Using a utility trailer with either a truck or ATV is a good way to get your blind into a wider variety of locations than a tractor. Simply position the blind onto the trailer, strap it down with ratchet straps, then drive it to your location.
You’ll want to be mindful of the terrain along the way. Hopefully, you already have a good idea of the condition of any two-track or backroads that you may be hauling on. Surprises are not good when you are hauling heavy, hard-sided blinds.
3. Ambush Hunting Blind Ski Kit
The Ambush Hunting Blind Ski Kit will allow you to ditch the trailer and get your blind deeper into the woods! The hunting blind ski kit comes with two strong steel skis to pull your hunting blind through the woods or on the ice that are powder coated in black to match your blind. The skis include 3/8″ Hyfax to protect the ski from wear and tear and to make pulling easier. Simply attach the skis to your Stalker blind using the grade 8 bolts and nuts that are included with the ski kit.
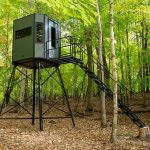
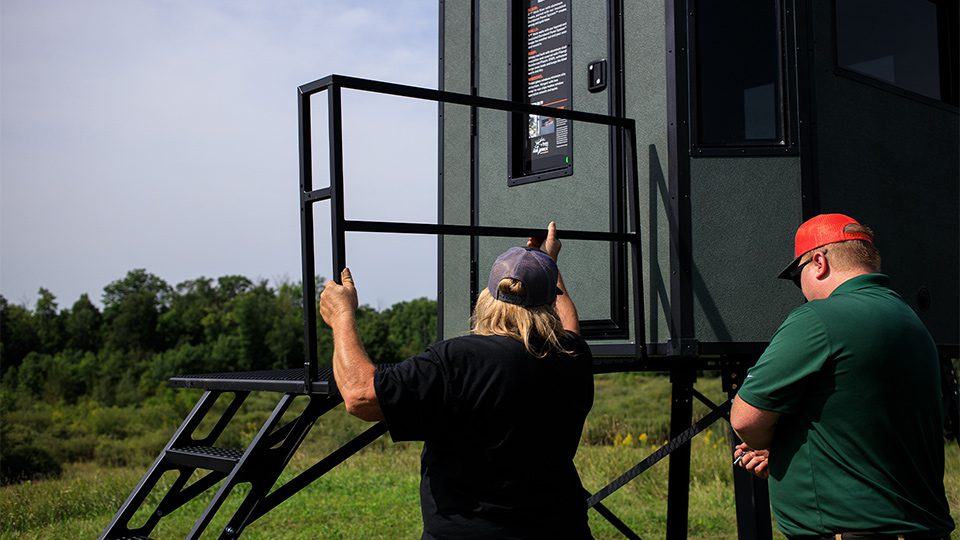
Using Your Ambush Blind With Stair Kit
With the right equipment, it’s easy enough to tow your hard-sided blind to a location in the woods, orient it right, and leave it. Using your Ambush blind with the stair kit is a long-term install. So again, choose your location wisely. An Ambush hunting blind weighs a few hundred pounds, and total assembly time is at least 4 hours with three people. This isn’t a project you want to repeat every couple of weeks or even every couple of months.
We have a detailed instructional video below that shows you how to assemble the stair kit and stand, then connect it to the blind itself.
Camouflaging Tips and Accessories
Hard-sided blinds, like the Ambush Stalker or Phantom blinds, are not typically brushed in. At 72 inches wide and nearly 7 feet tall it’s just not practical. Plus, if given enough time for deer to get used to it, there’s really no need to brush it in any way.
But there are some things you can do though to help your blind blend in better.
One thing you can do is set your blind back in on the edge of the tree line. This will help break up the outline a little bit while also giving you cover to enter and leave the blind without being detected.
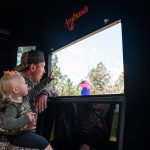
We also have the Camo Window Treatment product that brings concealment to a new level. The Camo Window Treatment completely covers all the windows in your blind with a realistic camo pattern. It masks your presence but allows you to see outside without obstruction. Deer can’t see you, but you can see them!
Want to make your hunting season even plusher? Add some killer accessories like the steel cup holder or hunting blind bow hanger that allows you to be hands-free until the moment of truth arrives.
Don’t let freezing weather ruin you or your kids’ time outside. We offer a ventless heater that attaches right to the wall, with a port for the propane attachment. Your propane tank stays outside while you stay warm inside. Being outside longer means more opportunities to fill your freezer.