How To: Skin a Deer for a Shoulder Mount
Congratulations on a successful hunt from your hunting blind! You just took a monster 12-pointer and you decided in advance that, if you got a trophy, you were going to get a shoulder mount. If this is the scenario that plays out, you want make sure you follow these instructions when skinning your deer. If you skin the deer improperly, it could cause issues for the taxidermist, or possibly destroy the hide. You want to be able to show this trophy off for years to come, so be sure to follow along closely and learn how to skin a deer for a shoulder mount.
Step 1:
First, when gutting your deer, do not open the chest up in-between the front shoulders. You want to stop about 8-12 inches before you reach the shoulders. Also, do not open up the brisket area by cutting a “U” between the front shoulders.
Step 2:
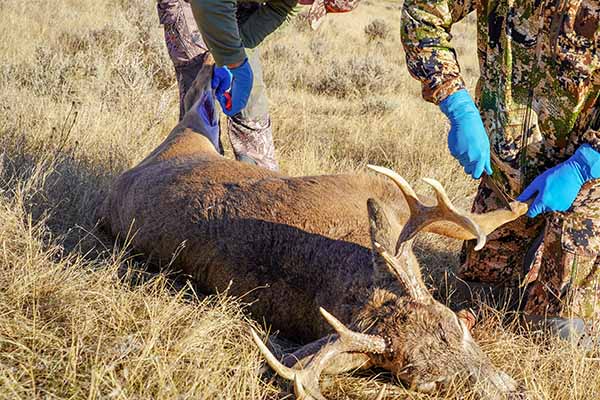
Start by making your first cut about 6 inches back from the front shoulder. This cut will go around the circumference of the deer. Then, make a cut starting at the front knee joint and go up the backside of the leg. Cut all the way up the leg until it connects with the previous circumference cut.
Step 3:
Next, you are going to “skin” or remove the hide. Carefully cut the skin away from the meat. Make sure you are only pulling the skin away, do not bring any meat with it. Pull the skin down as you work your way to the head.
Step 4:
Now, using a bone saw, cut through the neck to detach the head from the neck. Leave about 3 inches of meat behind the ears of the deer. This allows the taxidermist to mimic the size of the rutting neck on the shoulder mount.
Step 5:
Finally, take the cape and head to the taxidermist. If it will be a while before you can get your mount to the taxidermist, store it in the freezer to prevent damage to the cape.
Send us pictures of your completed shoulder mounts on Facebook! And as always, stay safe and be sure to visit one of our expert hunting blind dealers near you.


